

Regarded by many as one of the most spectacular day walks in Victoria, Stapylton Amphitheatre follows a challenging unmarked route across the ridge between Hollow Mountain and Mt Stapylton in Grampians National Park. Featuring exposed scrambling, climbing through a cave, awkward precipitous drops and the infamous Ravine, this beautifully rugged but arduous walk is best undertaken by experienced hikers only.
Distance: 6.6 km (loop)
Gradient: Alternates between relatively easy, gentle gradients and section of extremely difficult terrain requiring a lot of scrambling, as well as a section requiring an awkward 2 metre drop of a very exposed ledge below.
Quality of Path: Largely unmodified heading towards Hollow Mountain and coming off Mt Stapylton; non-existent otherwise. The main part of this walk is an unmarked route and map reading skills are essential. The rocky scrambles would be very slippery after rain - extra caution must be taken.
Quality of Signage: Well marked leading to Hollow Mountain and off Mt Stapylton; non-existent otherwise. The main part of this walk is an unmarked route and map reading skills are essential
Experience Required: Previous Bushwalking Experience Required. This is a very hard walk with an untracked section in steep and potentially dangerous terrain known for its unpredictable weather, with large sections of the walk requiring scrambling. Highly unsuitable for all but experienced hikers who are comfortable with navigation and scrambling along ridges with a lot of exposure. Do not even think about tackling this walk in wet or windy conditions.
Time: 5-7 Hours
Steps: Many formal and informal steps, plus a lot of scrambling required
Best Time to Visit: Possible to do all year round, though this track should not be attempted in extremely hot weather, or if there is a possibility of wet weather or high wind conditions.
Entry Fee: No
Entry Fee: No
Getting There: Access to Hollow Mountain is via Mt Zero Road. Heading from Halls Gap, walkers can either take the unsealed Mt Zero Road just off Grampians Rd, or take Western Hwy, Wonwondah-Dadswells Bridge Rd and Flat Rock Rd to join Mt Zero Rd closer to the car park.

Grampians National Park has been on my wish list to visit for almost 20 years. Images of the Balconies and McKenzie Falls from an old Steve Parish book had captured my imagination, and when we decided to do an east coast hiking trip over the Summer of 2016-17, the Grampians were a high priority. After a night in Melbourne and an incredible lunch at Brae in Birregurra, Alissa and I headed north-west to Halls Gap. Although not significantly taller than the tallest peaks of the Stirling Range, the Grampians are a much larger mountain range, and Alissa and I were amazed by the towering mountains surrounding the town.
Although most of the most famous tourist walks are within a short drive of Halls Gap, many guidebooks and blogs suggested that the best walk in the entire park was Stapylton Amphitheatre amongst the shorter peaks of the northernmost section of the Grampians. Linking the two marked trails of Hollow Mountain and Mt Stapylton across a rocky ridge, Stapylton Amphitheatre is not recognised as an official trail by Parks Victoria due to its potentially dangerous terrain, and as such it was a bit of a hard sell to Alissa given her fear of heights. With the shorter Hollow Mountain Walk as the first part of Stapylton Amphitheatre, we agreed that we would at least complete the Hollow Mountain section, and then pull the pin on Stapylton Amphitheatre if it proved too hard.

Beginning at the Hollow Mountain car park, the walk initially follows a marked trail to the summit of Hollow Mountain. The Northern Grampians were significantly burnt by bushfires in 2014 and although the area is definitely recovering well, there are still a lot of burnt out trees along the steps leading to the foot of the mountain.

The track is well marked, predominantly by yellow triangles painted directly to the rock, with the occasional odd marker like the white marker pictured above indicating where the trail snakes up and around to a rock ramp overhead.

Although the Hollow Mountain trail is relatively tame compared to the ridge walk section of the walk, the track does require some scrambling. This early scrambling is relatively easy and straightforward however, and should be within reach of most moderately fit hikers - certainly easier than the scrambling on Toolbrunup and Talyuberlup in Western Australia's Stirling Range.

Once up and over the rock ramp scramble, walkers will see the orange and grey rock wall of Hollow Mountain. To the left is Echoes Block, a name that makes a lot of sense give the reverberations that can be heard in the area. The track curves around the mountain to the right of the rock wall.

Even at this point, the views across the range are excellent, and we hadn't even reach the top of the relatively short 388 metre Hollow Mountain.

Around the bend, the trail goes up a broad rock ramp that is relatively straightforward walking. The Sandstone formations along the track were really interesting, with shapes that looked a lot like the artificial rocks of rock climbing walls. Being used to the cracks and crevices of the otherwise smooth Granite that dominates the high country in southwestern Western Australia, this was a revelation to Alissa and I as these kinds of rock formations were clearly the influence on the artificial climbs. The good hand holds of these rocks would be a big help to us as it made the scrambling later achievable.

From the Hollow Mountain summit, walkers get to see what they're up against. Mt Stapylton looms in the centre of the photo, with the ridge between running all the way to the start of Echoes Block. Alissa was still not entirely convinced she could make it, and I had to admit that the massive ravine separating Mt Stapylton from the ridge looked a bit daunting from here.

Climbing back down the mountain, Alissa and I headed towards the barely visible cave at the bottom of Echoes Block, pictured to the left in the photo above.

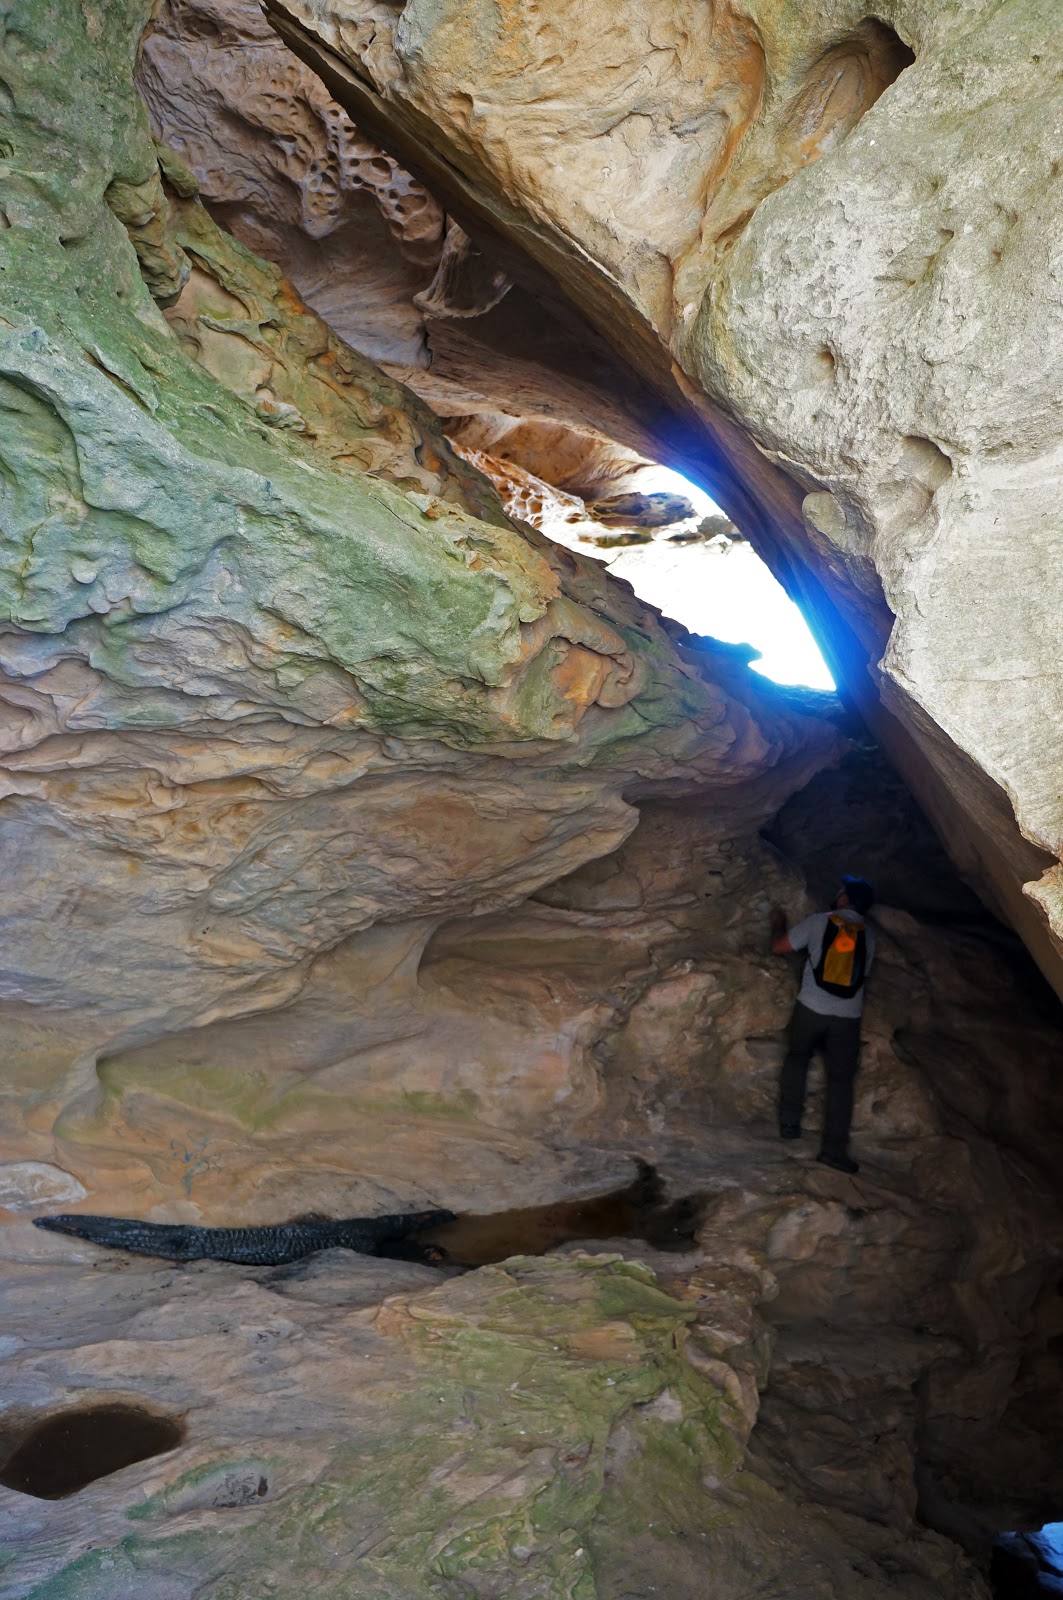
The cave entrance is wide but narrow, and it required crawling on hands and knees to get through the tunnel to the main cavern of the cave.

On the other side, the cavern is still small but is at least wide enough for a few people to stand. The cave is however fairly tall, having several levels on the way to the top of Echoes Block.

Getting to the second level from the cave floor is a fairly easy scramble.

The scramble to the upper levels is a bit more difficult, however it was still somewhat straightforward.

Once on the third level, walkers have two options - either awkwardly use their arms to pull themselves through a final hole up to the top of Echoes Block, or exit through a side cave entrance to walk along an exposed shelf (we chose to do the latter). As you can see from Alissa's facial expression, this was where the difficult part of the walk was about to begin.

To the left of the cave entrance, the rocky shelf narrows and does not look like it would be a suitable way to climb up to the top.

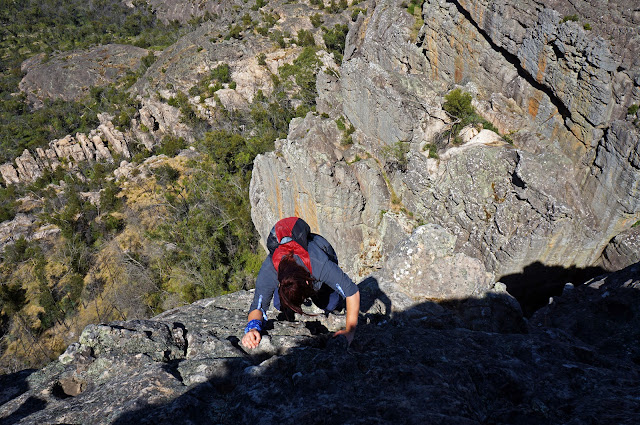
This leaves the wider part of the shelf to the right and an awkward scramble up the slope. This was actually one of the more challenging scrambles of the day, as while there were a few hand and foot holds the options were very limited, and the slope was such that missing the correct sequence of moves could result in a slip and a potential slide right off the edge. Being more confident with scrambling, I made my way up first. Alissa followed, however her feet slipped off one of the rocks leaving her holding on with just her hands with her legs dangling down the slope. Obviously scared in her precarious situation, I helped Alissa up over the edge and we were thankfully safe on top of Echoes Block. The shock of the experience set in, and Alissa tearfully said; "I'm not good at climbing, Don" and we discussed whether we should go back. Going down the slope did not look particularly inviting however, and we decided to continue on across the ridge with the agreement to turn back if it got too challenging.

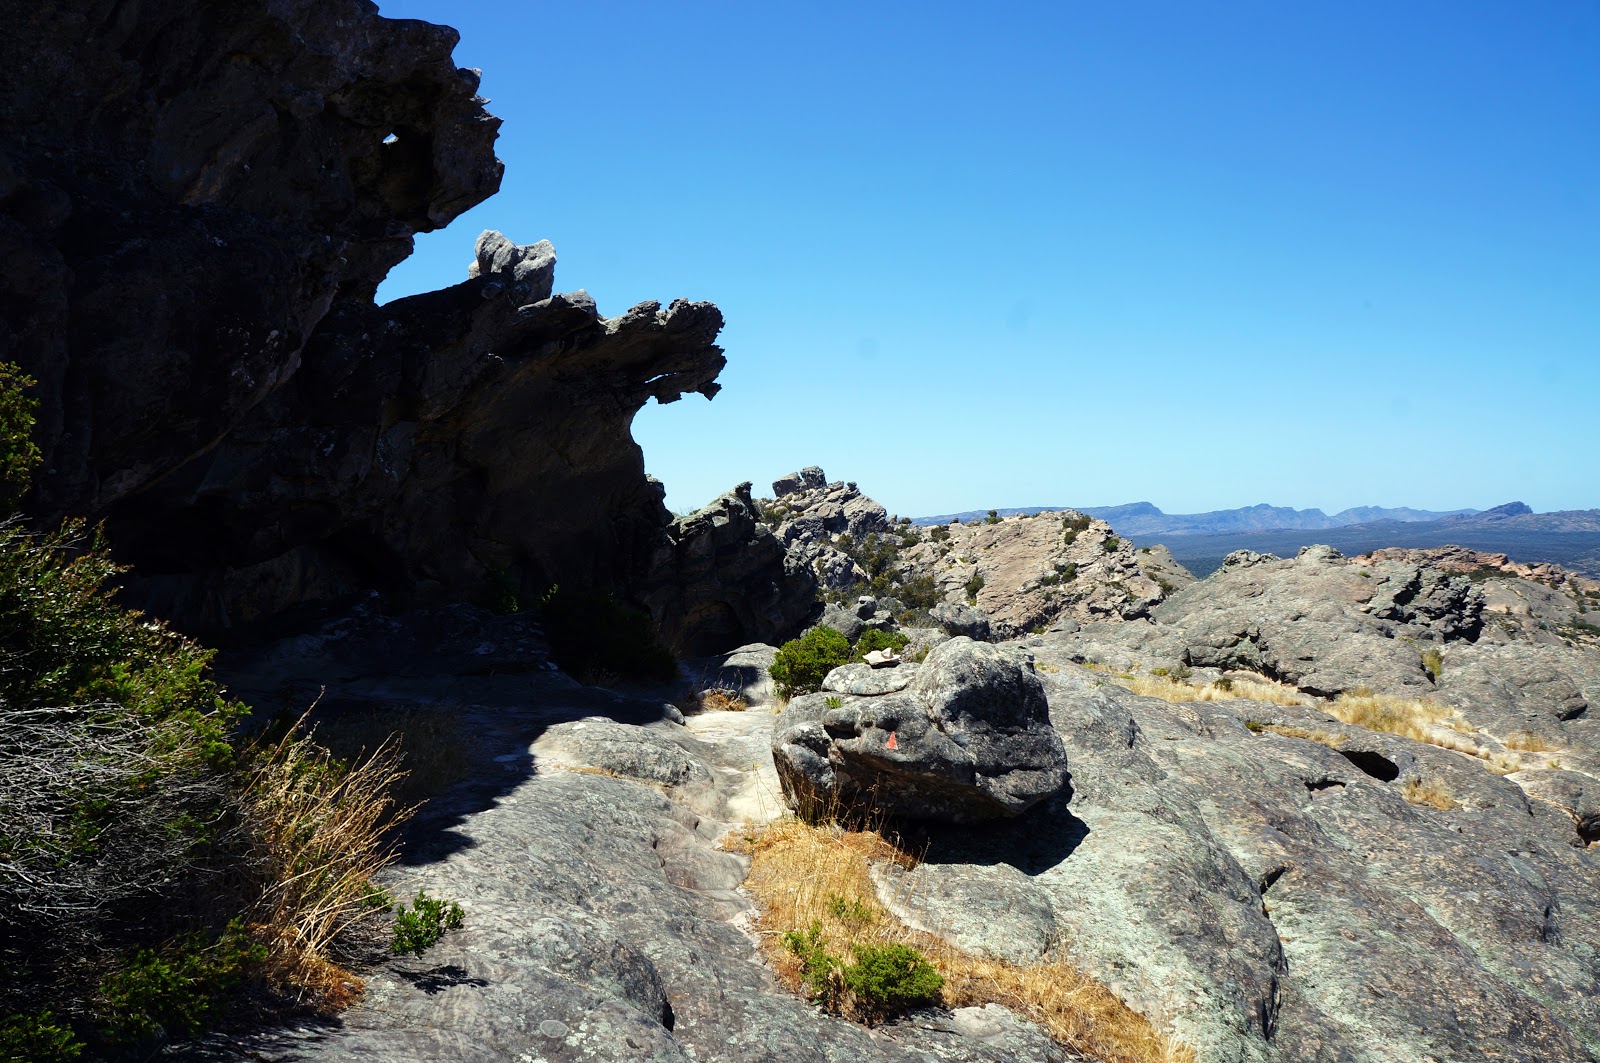
Walking across the top of the ridge, the wind and water scoured shapes were absolutely intriguing. Although unmarked, being a ridge walk meant it was mostly clear where we needed to get to, with Alissa and I picking the path of least resistance. At this point, walkers will need to keep fairly close to the western (right) side of the the ridge as a rule of thumb.

It was not long before Alissa and I were at the next major pinch point of the walk - a 2 metre drop off to a lower ledge. The two metre drop is not the problem - the scary part is that there is a roughly 30 cm gap between the two sections and a lot of exposure to the right; if you don't land forward enough or without enough clearance on the right it could be a much greater fall than 2 metres! I was admittedly a bit nervous, especially since Alissa had initially wanted to lower herself backwards and there was a chance of falling down the gap. Alissa sat on the edge and inched her way forwards. She surprised both of us by deciding to be the first one over, doing so before I could even get the camera ready!

With Alissa over, I followed immediately after. This was a point where we really had to commit to continuing on given the somewhat dangerous exposure, however I decided to check if the climb was achievable if we had to turn back. There were enough holds to suggest it was doable, which was good to know that we had alternatives if the journey ahead was just too hard.

This next section of the walk followed a narrow ledge right along the western side of the ridge.
This was the most exposed we would be over the whole walk. The ledge narrowed and became impassable, and Alissa and I had to then scramble up to higher ground to continue on. The abundance of hand and foot holds made it seem relatively safe and achievable at the time, but looking at the photo above makes it clear how vertiginous a drop it actually was.

Safely onto the top of the ridge again, the walking became easier until we reached a dead end. At this point, we had to retrace our steps and explore the options to make our way to another ridge to the east.

Neither of the two most obvious options were ideal, however we decided to follow Alissa's preferred option of lowering ourselves via a crevice between rocks and then crossing the gully separating the ridges by climbing over a large boulder. The benefit of this option was that we would be able to cross over to the other ridge fairly easily, whereas the other option had an easier exit from the first ridge but a harder climb across to the other side.

Once on the neighbouring ridge, Alissa and I continued following the ridge southward to Mt Stapylton.

As we continued walking, we arrived at the next and arguably most daunting challenge of the whole walk - the infamous Ravine. The Ravine is one metre wide and several metres deep, and is right in the way of the shortest path when continuing along the ridge.

Alissa and I knew this was coming up, and had practiced jumping a metre in preparation for clearing this obstacle. We realised however that the problem was not so much the 1 metre that we'd need to jump or the 20 metre drop so much as the fact there was very little in the way of space to land. The small rock in the top left of the photo above was all we had to shoot for, and it would be very easy to overshoot the mark and find yourself tumbling forward after landing, or second guessing the jump and overcompensating by not jumping far enough and falling into the Ravine itself. Neither Alissa or I were convinced we could make the jump successfully, so we chose the longer way around - if you follow the ridge to the eastern side and descend down, it is possible to avoid the Ravine altogether.

There is actually a fairly easy passageway right at the end of the Ravine, however I hadn't seen it when we came around the corner looking for a way down. I found a decent enough way to climb down, and once I got to the bottom I found the easier passageway and advised Alissa to take the less challenging route. Keep an eye out for a small chasm with a rock wedged high above in the gap - it is hard to miss once you know what you are looking for.

The downside to taking this longer route is that it requires a walk back up to the top of the ridge and is much longer than if just continuing across the Ravine.

Finding the easiest route was a bit of a fun challenge. A lot of scrambling and squeezing ourselves through crevices and up over boulders was required, however it was definitely no where near as terrifying as jumping over the Ravine and was a good alternative option.

After one last climb, we were back on track and on top of the ridge once more.

Looking back across the ridge northwards, Alissa and I could see that the Ravine was one of many rock walls jutting out of the top of the ridge.

The walk became fairly easy again as we walked to reach the end of the ridge we were walking on. By now, the Summer Sun was getting pretty hot and it was obvious that Alissa and I had seriously underestimated how much water we needed on this walk. Our 1 litre bottles were woefully insufficient, and I would recommend taking at least double that amount if tackling this challenging walk.

We also foolishly did not read our guide book's instructions for some while, and had missed an important detail that the ridge was about to end and that we needed to find a route to the other side.

After wasting time walking to the end of the ridge and then backtracking, Alissa and I saw that there was an ill-defined bush bash through an overgrown gully that we could follow to lead to an obvious rock ramp up to the next ridge.

The first part of the ramp was fairly easy to walk up, however we eventually reached two points that required scrambling.

The first scramble was fairly easy as there were plenty of holds available.

The second was a bit more like bouldering, as the next ledge above jutted out and required using holds under the ledge to push one's self up and on top. This was arguably trickier than the first climb that Alissa slipped on earlier in the day, however having undertaken a whole lot of scrambling in the interim meant she was able to negotiate this obstacle with relative ease.

After this scramble, Alissa and I followed the gentle ascent to the top of Mt Stapylton. In wetter months, the mountain's tarns are filled with water, however they were all well and truly dry at the time we did the walk. Nevertheless, the views from the top of Mt Stapylton are pretty spectacular, with the Grampians stretching on southward towards the horizon.

Once at the summit of Mt Stapylton, the walk once again follows a marked trail back down the mountain. Although this is a marked tourist trail, the descent requires a surprising amount of scrambling, although none of it was particularly difficult compared to what we had had to do along the ridge.


The red painted arrows are very easy to follow, initially leading down to a wide ledge.

At the wide ledge, the trail passes by a cave that seems to be used occasionally by rock climbers. If we had more water with us, this would have been a great spot for a quick break but will less than 200 ml of water left each, we decided to press on.

Confusingly, the track rises up again after the cave, crossing over to a gradual slope on the other side of the mountain.

Descending on the other side, walkers enter a valley filled with Eucalypt woodlands and a dense understorey of regrowth from after the bushfires. Walkers may notice that the gully encountered earlier runs into the valley as well. The walk through the valley follows a sandy track around to the western side of the ridge and passes by the Stapylton Campgrounds. At the time of our visit, the Campgrounds were still closed due to the bushfire recovery, however it would make an excellent base from which to do this walk.

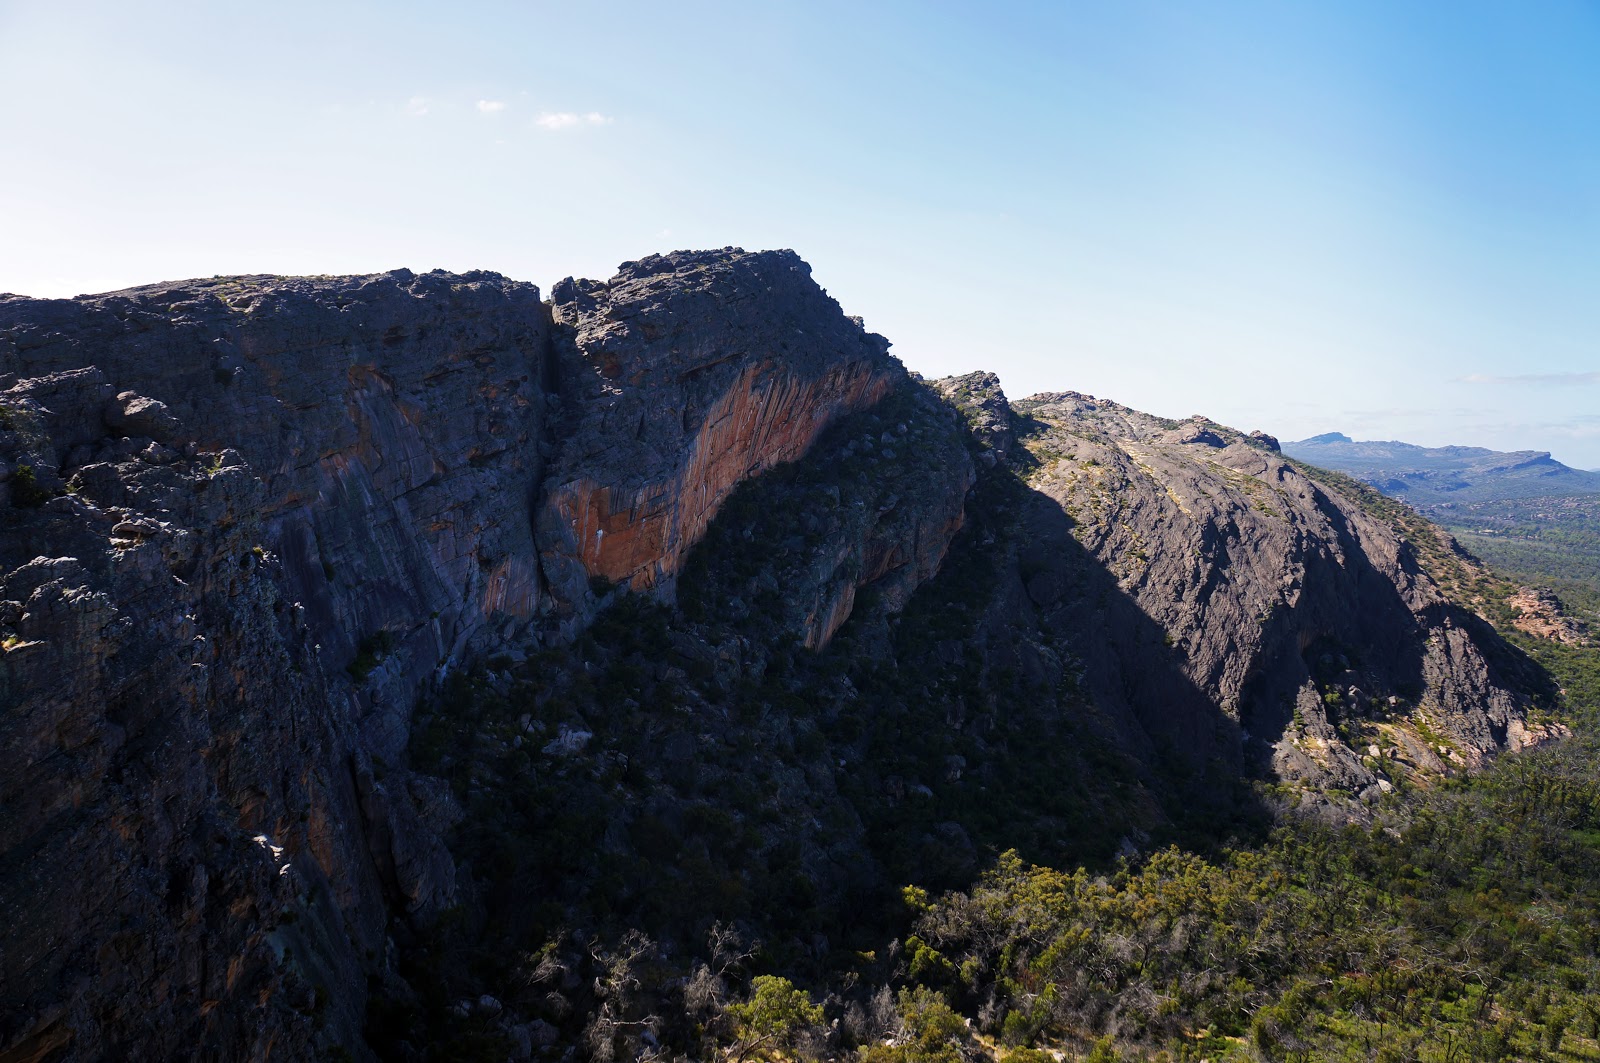
Walking along the west side of the Stapylton Amphitheatre afforded Alissa and I the opportunity to see the ridge we had just walked from ground level. Seeing the sheer size of the rugged walls certainly filled us with a great sense of accomplishment in having actually made it across.

When selling the walk to Alissa, I had told her that there was a rock formation known as Bird Rock along the Stapylton Amphitheatre walk and she kept asking me where it was as were walking along the ridge. Alissa was happy to finally see Bird Rock as we made our way towards the Mt Zero car park.

The track descends along a final rocky slope towards Mt Zero car park, with Mt Zero just beyond it. Mt Zero car park is a major landmark along this walk, as from there it is only a short few kilometres to return back to the Hollow Mountain car park.
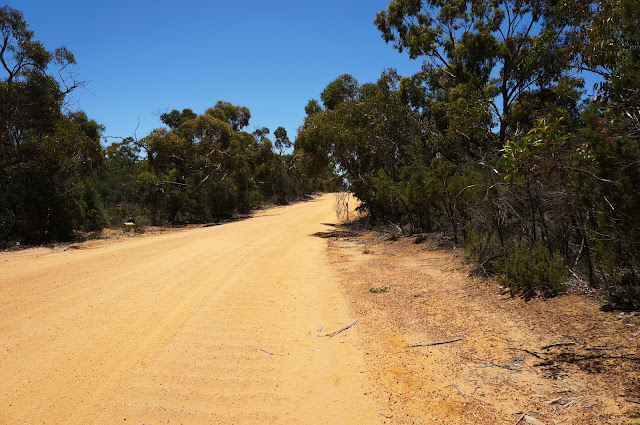
The walk from the Mt Zero car park to Hollow Mountain runs along a gravel road, but it is at least only a short 1.3 kilometres. The old road to Hollow Mountain is closed off for vehicles, but provides a good shortcut for walkers to get back to their cars and the end of the walk's loop.
Stapylton Amphitheatre was by far the most difficult walk that Alissa and I have undertaken to date, with seriously challenging terrain, worrying levels of exposure and slow going route finding across the top of the ridge. It was also one of the best and most exhilarating walks we've ever undertaken, and although Alissa started the walk absolutely terrified she ended it having enjoyed the challenge and breathtaking scenery. Given its difficulty, I see why Parks Victoria keep this one pretty quiet, and I myself would not recommend this walk to anyone who was not an experienced walker. For those who are experienced, comfortable with heights and up for a challenge, the Stapylton Amphitheatre is an incredible and unforgettable experience - it lived up to it reputation as one of Victoria's best walks. Glenn Tempest's Daywalks Around Victoria is an essential guide for this walk, as is the KML file he offers from his website; I wouldn't tackle this walk without both.

With the challenging walk finished, Alissa and I decided to check out some of the other more tourist-friendly sights of the Grampians I'd always wanted to see, including the beautiful McKenzie Falls.

Finally, I got to achieve a dream I've had since I received a Steve Parish book for a birthday present when I was a kid - to see the famous Balconies. Parks Victoria discourage people from climbing out to the Balconies themselves as they could collapse at any moment. Having already had a thrilling walk, Alissa and I were happy to just see them from the lookout nearby with the golden glow of the fading Sun bringing an end to a great day of adventure in the Grampians Range.

Grampians National Park has been on my wish list to visit for almost 20 years. Images of the Balconies and McKenzie Falls from an old Steve Parish book had captured my imagination, and when we decided to do an east coast hiking trip over the Summer of 2016-17, the Grampians were a high priority. After a night in Melbourne and an incredible lunch at Brae in Birregurra, Alissa and I headed north-west to Halls Gap. Although not significantly taller than the tallest peaks of the Stirling Range, the Grampians are a much larger mountain range, and Alissa and I were amazed by the towering mountains surrounding the town.
Although most of the most famous tourist walks are within a short drive of Halls Gap, many guidebooks and blogs suggested that the best walk in the entire park was Stapylton Amphitheatre amongst the shorter peaks of the northernmost section of the Grampians. Linking the two marked trails of Hollow Mountain and Mt Stapylton across a rocky ridge, Stapylton Amphitheatre is not recognised as an official trail by Parks Victoria due to its potentially dangerous terrain, and as such it was a bit of a hard sell to Alissa given her fear of heights. With the shorter Hollow Mountain Walk as the first part of Stapylton Amphitheatre, we agreed that we would at least complete the Hollow Mountain section, and then pull the pin on Stapylton Amphitheatre if it proved too hard.

Beginning at the Hollow Mountain car park, the walk initially follows a marked trail to the summit of Hollow Mountain. The Northern Grampians were significantly burnt by bushfires in 2014 and although the area is definitely recovering well, there are still a lot of burnt out trees along the steps leading to the foot of the mountain.

The track is well marked, predominantly by yellow triangles painted directly to the rock, with the occasional odd marker like the white marker pictured above indicating where the trail snakes up and around to a rock ramp overhead.

Although the Hollow Mountain trail is relatively tame compared to the ridge walk section of the walk, the track does require some scrambling. This early scrambling is relatively easy and straightforward however, and should be within reach of most moderately fit hikers - certainly easier than the scrambling on Toolbrunup and Talyuberlup in Western Australia's Stirling Range.

Once up and over the rock ramp scramble, walkers will see the orange and grey rock wall of Hollow Mountain. To the left is Echoes Block, a name that makes a lot of sense give the reverberations that can be heard in the area. The track curves around the mountain to the right of the rock wall.

Even at this point, the views across the range are excellent, and we hadn't even reach the top of the relatively short 388 metre Hollow Mountain.

Around the bend, the trail goes up a broad rock ramp that is relatively straightforward walking. The Sandstone formations along the track were really interesting, with shapes that looked a lot like the artificial rocks of rock climbing walls. Being used to the cracks and crevices of the otherwise smooth Granite that dominates the high country in southwestern Western Australia, this was a revelation to Alissa and I as these kinds of rock formations were clearly the influence on the artificial climbs. The good hand holds of these rocks would be a big help to us as it made the scrambling later achievable.
From the Hollow Mountain summit, walkers get to see what they're up against. Mt Stapylton looms in the centre of the photo, with the ridge between running all the way to the start of Echoes Block. Alissa was still not entirely convinced she could make it, and I had to admit that the massive ravine separating Mt Stapylton from the ridge looked a bit daunting from here.

Climbing back down the mountain, Alissa and I headed towards the barely visible cave at the bottom of Echoes Block, pictured to the left in the photo above.

The cave entrance is wide but narrow, and it required crawling on hands and knees to get through the tunnel to the main cavern of the cave.

On the other side, the cavern is still small but is at least wide enough for a few people to stand. The cave is however fairly tall, having several levels on the way to the top of Echoes Block.

Getting to the second level from the cave floor is a fairly easy scramble.
The scramble to the upper levels is a bit more difficult, however it was still somewhat straightforward.

To the left of the cave entrance, the rocky shelf narrows and does not look like it would be a suitable way to climb up to the top.

This leaves the wider part of the shelf to the right and an awkward scramble up the slope. This was actually one of the more challenging scrambles of the day, as while there were a few hand and foot holds the options were very limited, and the slope was such that missing the correct sequence of moves could result in a slip and a potential slide right off the edge. Being more confident with scrambling, I made my way up first. Alissa followed, however her feet slipped off one of the rocks leaving her holding on with just her hands with her legs dangling down the slope. Obviously scared in her precarious situation, I helped Alissa up over the edge and we were thankfully safe on top of Echoes Block. The shock of the experience set in, and Alissa tearfully said; "I'm not good at climbing, Don" and we discussed whether we should go back. Going down the slope did not look particularly inviting however, and we decided to continue on across the ridge with the agreement to turn back if it got too challenging.

Walking across the top of the ridge, the wind and water scoured shapes were absolutely intriguing. Although unmarked, being a ridge walk meant it was mostly clear where we needed to get to, with Alissa and I picking the path of least resistance. At this point, walkers will need to keep fairly close to the western (right) side of the the ridge as a rule of thumb.

It was not long before Alissa and I were at the next major pinch point of the walk - a 2 metre drop off to a lower ledge. The two metre drop is not the problem - the scary part is that there is a roughly 30 cm gap between the two sections and a lot of exposure to the right; if you don't land forward enough or without enough clearance on the right it could be a much greater fall than 2 metres! I was admittedly a bit nervous, especially since Alissa had initially wanted to lower herself backwards and there was a chance of falling down the gap. Alissa sat on the edge and inched her way forwards. She surprised both of us by deciding to be the first one over, doing so before I could even get the camera ready!

With Alissa over, I followed immediately after. This was a point where we really had to commit to continuing on given the somewhat dangerous exposure, however I decided to check if the climb was achievable if we had to turn back. There were enough holds to suggest it was doable, which was good to know that we had alternatives if the journey ahead was just too hard.

This next section of the walk followed a narrow ledge right along the western side of the ridge.

This was the most exposed we would be over the whole walk. The ledge narrowed and became impassable, and Alissa and I had to then scramble up to higher ground to continue on. The abundance of hand and foot holds made it seem relatively safe and achievable at the time, but looking at the photo above makes it clear how vertiginous a drop it actually was.

Safely onto the top of the ridge again, the walking became easier until we reached a dead end. At this point, we had to retrace our steps and explore the options to make our way to another ridge to the east.

Neither of the two most obvious options were ideal, however we decided to follow Alissa's preferred option of lowering ourselves via a crevice between rocks and then crossing the gully separating the ridges by climbing over a large boulder. The benefit of this option was that we would be able to cross over to the other ridge fairly easily, whereas the other option had an easier exit from the first ridge but a harder climb across to the other side.

Once on the neighbouring ridge, Alissa and I continued following the ridge southward to Mt Stapylton.

As we continued walking, we arrived at the next and arguably most daunting challenge of the whole walk - the infamous Ravine. The Ravine is one metre wide and several metres deep, and is right in the way of the shortest path when continuing along the ridge.

Alissa and I knew this was coming up, and had practiced jumping a metre in preparation for clearing this obstacle. We realised however that the problem was not so much the 1 metre that we'd need to jump or the 20 metre drop so much as the fact there was very little in the way of space to land. The small rock in the top left of the photo above was all we had to shoot for, and it would be very easy to overshoot the mark and find yourself tumbling forward after landing, or second guessing the jump and overcompensating by not jumping far enough and falling into the Ravine itself. Neither Alissa or I were convinced we could make the jump successfully, so we chose the longer way around - if you follow the ridge to the eastern side and descend down, it is possible to avoid the Ravine altogether.

There is actually a fairly easy passageway right at the end of the Ravine, however I hadn't seen it when we came around the corner looking for a way down. I found a decent enough way to climb down, and once I got to the bottom I found the easier passageway and advised Alissa to take the less challenging route. Keep an eye out for a small chasm with a rock wedged high above in the gap - it is hard to miss once you know what you are looking for.

The downside to taking this longer route is that it requires a walk back up to the top of the ridge and is much longer than if just continuing across the Ravine.

Finding the easiest route was a bit of a fun challenge. A lot of scrambling and squeezing ourselves through crevices and up over boulders was required, however it was definitely no where near as terrifying as jumping over the Ravine and was a good alternative option.

After one last climb, we were back on track and on top of the ridge once more.

Looking back across the ridge northwards, Alissa and I could see that the Ravine was one of many rock walls jutting out of the top of the ridge.

The walk became fairly easy again as we walked to reach the end of the ridge we were walking on. By now, the Summer Sun was getting pretty hot and it was obvious that Alissa and I had seriously underestimated how much water we needed on this walk. Our 1 litre bottles were woefully insufficient, and I would recommend taking at least double that amount if tackling this challenging walk.

We also foolishly did not read our guide book's instructions for some while, and had missed an important detail that the ridge was about to end and that we needed to find a route to the other side.

After wasting time walking to the end of the ridge and then backtracking, Alissa and I saw that there was an ill-defined bush bash through an overgrown gully that we could follow to lead to an obvious rock ramp up to the next ridge.

The first part of the ramp was fairly easy to walk up, however we eventually reached two points that required scrambling.

The first scramble was fairly easy as there were plenty of holds available.

The second was a bit more like bouldering, as the next ledge above jutted out and required using holds under the ledge to push one's self up and on top. This was arguably trickier than the first climb that Alissa slipped on earlier in the day, however having undertaken a whole lot of scrambling in the interim meant she was able to negotiate this obstacle with relative ease.

After this scramble, Alissa and I followed the gentle ascent to the top of Mt Stapylton. In wetter months, the mountain's tarns are filled with water, however they were all well and truly dry at the time we did the walk. Nevertheless, the views from the top of Mt Stapylton are pretty spectacular, with the Grampians stretching on southward towards the horizon.

Once at the summit of Mt Stapylton, the walk once again follows a marked trail back down the mountain. Although this is a marked tourist trail, the descent requires a surprising amount of scrambling, although none of it was particularly difficult compared to what we had had to do along the ridge.


The red painted arrows are very easy to follow, initially leading down to a wide ledge.
At the wide ledge, the trail passes by a cave that seems to be used occasionally by rock climbers. If we had more water with us, this would have been a great spot for a quick break but will less than 200 ml of water left each, we decided to press on.

Confusingly, the track rises up again after the cave, crossing over to a gradual slope on the other side of the mountain.
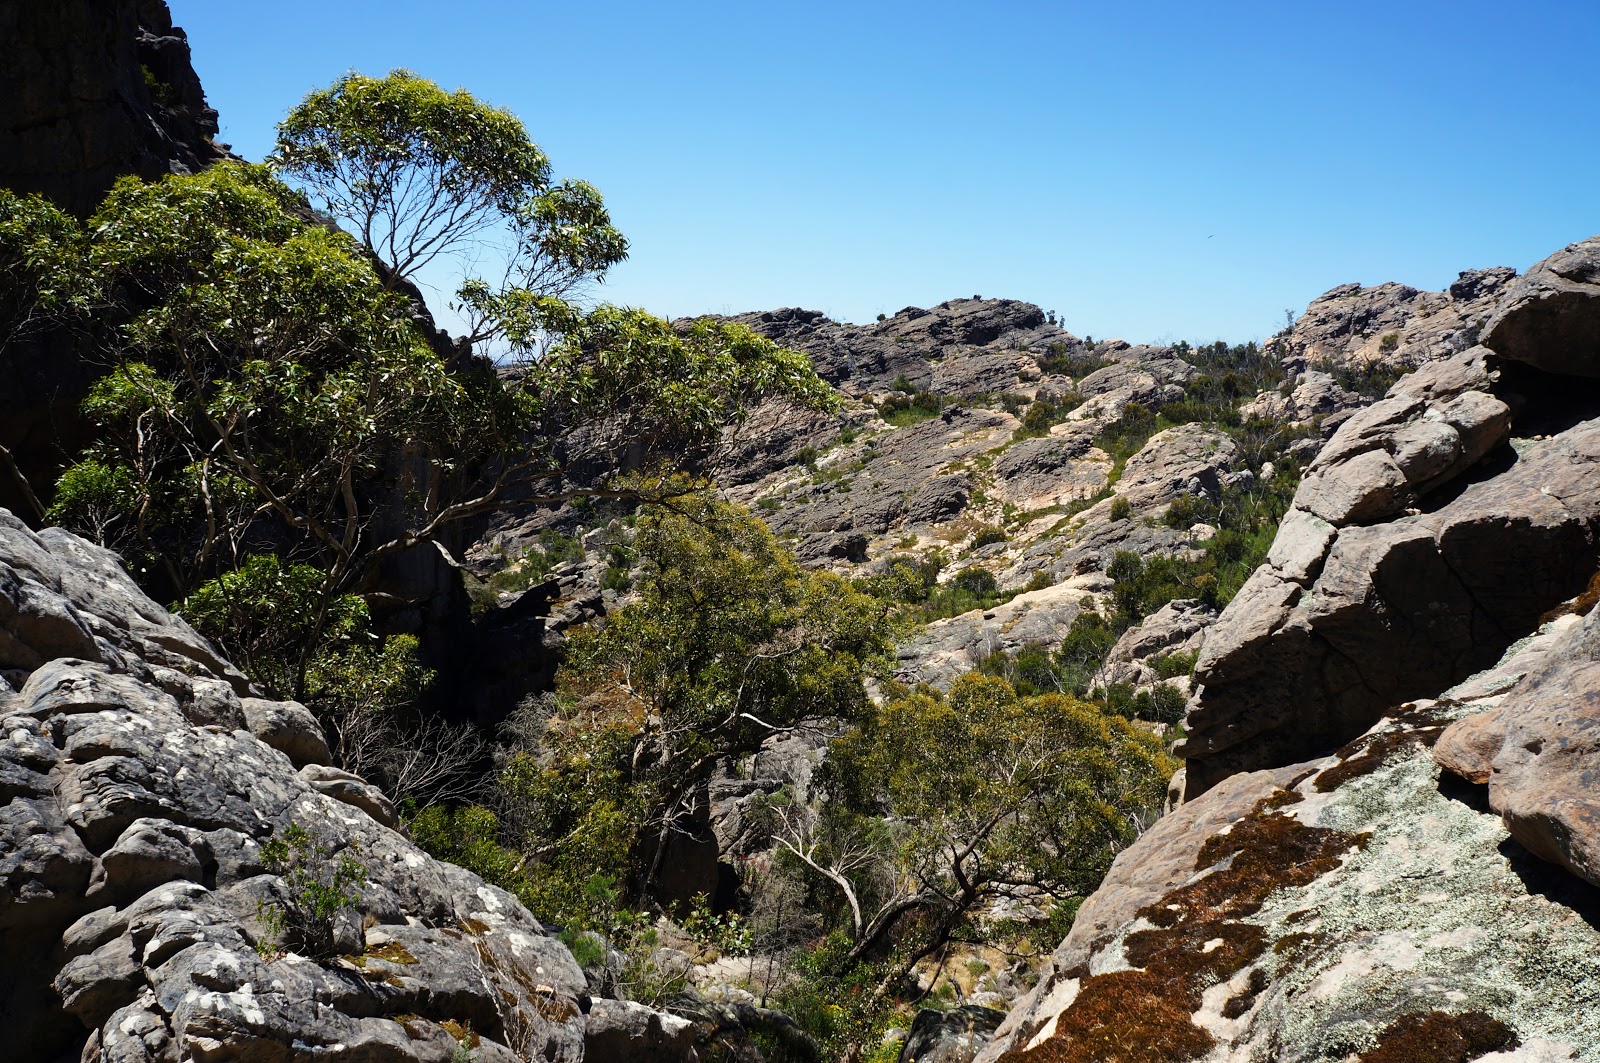
Descending on the other side, walkers enter a valley filled with Eucalypt woodlands and a dense understorey of regrowth from after the bushfires. Walkers may notice that the gully encountered earlier runs into the valley as well. The walk through the valley follows a sandy track around to the western side of the ridge and passes by the Stapylton Campgrounds. At the time of our visit, the Campgrounds were still closed due to the bushfire recovery, however it would make an excellent base from which to do this walk.

Walking along the west side of the Stapylton Amphitheatre afforded Alissa and I the opportunity to see the ridge we had just walked from ground level. Seeing the sheer size of the rugged walls certainly filled us with a great sense of accomplishment in having actually made it across.

When selling the walk to Alissa, I had told her that there was a rock formation known as Bird Rock along the Stapylton Amphitheatre walk and she kept asking me where it was as were walking along the ridge. Alissa was happy to finally see Bird Rock as we made our way towards the Mt Zero car park.

The track descends along a final rocky slope towards Mt Zero car park, with Mt Zero just beyond it. Mt Zero car park is a major landmark along this walk, as from there it is only a short few kilometres to return back to the Hollow Mountain car park.

The walk from the Mt Zero car park to Hollow Mountain runs along a gravel road, but it is at least only a short 1.3 kilometres. The old road to Hollow Mountain is closed off for vehicles, but provides a good shortcut for walkers to get back to their cars and the end of the walk's loop.
Stapylton Amphitheatre was by far the most difficult walk that Alissa and I have undertaken to date, with seriously challenging terrain, worrying levels of exposure and slow going route finding across the top of the ridge. It was also one of the best and most exhilarating walks we've ever undertaken, and although Alissa started the walk absolutely terrified she ended it having enjoyed the challenge and breathtaking scenery. Given its difficulty, I see why Parks Victoria keep this one pretty quiet, and I myself would not recommend this walk to anyone who was not an experienced walker. For those who are experienced, comfortable with heights and up for a challenge, the Stapylton Amphitheatre is an incredible and unforgettable experience - it lived up to it reputation as one of Victoria's best walks. Glenn Tempest's Daywalks Around Victoria is an essential guide for this walk, as is the KML file he offers from his website; I wouldn't tackle this walk without both.
Post-Script

With the challenging walk finished, Alissa and I decided to check out some of the other more tourist-friendly sights of the Grampians I'd always wanted to see, including the beautiful McKenzie Falls.

Finally, I got to achieve a dream I've had since I received a Steve Parish book for a birthday present when I was a kid - to see the famous Balconies. Parks Victoria discourage people from climbing out to the Balconies themselves as they could collapse at any moment. Having already had a thrilling walk, Alissa and I were happy to just see them from the lookout nearby with the golden glow of the fading Sun bringing an end to a great day of adventure in the Grampians Range.


Hey guys, great read. This is a really good, fun walk I think, although it does get a bit hot up there over summer. Completing the walk definitely gives you that euphoric feeling that you get after a hard walk. If your still over in Victoria maybe check out the Cathedrals southern circuit, I think its in Mr Tempest's book? (I'm up in Qld so can't check), there is a little bit of easy scrambling on that walk too.
ReplyDeleteCheers Kevin
Hi, thanks for the tip Kevin! Unfortunately we were only in Victoria for 5 days as a brief visit before we headed off to do the Overland in Tassie.
DeleteWe're hoping to head back to Victoria to do the Wilsons Promontory Circuit and the Grampians Peaks Trail when it is completed, and Tempest's book has definitely inspired a few other potential day walk hikes. Unfortunately, we're not sure when we'll get back as we're focusing on completing the Bibbulmun, Cape to Cape, Stirling Ridge and Karijini day walks this year, and next year is looking like a return visit to Tasmania to do Walls of Jerusalem and Freycinet Circuit. So many trails, so little time!
WOW! Really enjoyed this one and both of your drives to complete the walk. Crawling on knees through a cave is enough to have me break out in a sweat.
ReplyDeleteThanks Lee. This was definitely a tough one, but it definitely left us feeling euphoric when we completed it!
DeleteThank you for sharing your trip! Your post is the most detailed one I found so far! My friend and I suppose to challenge this track today but we started from mt stapylton! Luckily we didn't continuing due to the strong wind. After reading your post, I just realise my friend and I are not ready for it and we were even started from the wrong direction!
ReplyDeleteHi Jane, glad you found the post helpful. Its a very tough walk indeed - definitely the hardest walk we've ever done to date and I would thoroughly recommend doing some easier walks with scrambling before doing this one! In terms of direction - you can start the walk from either direction, however I personally feel that starting at Hollow Mountain is the easier way of doing it.
DeleteThis is a very intense walk. I did it on the weekend solo and took a print of these notes with me. Thanks guys. Great podcast too.
ReplyDeleteYou're most welcome! Yes, this is probably the hardest walk we've ever done. Spectacular scenery though!
DeleteI was trying to find this route on the weekend and really struggled. Didn't have any guide or knowledge, just a line on a map that didn't seem to exist any more! Initial tried from Staplyton side but couldn't find a way across the ravine after the summit. Went back the next day from the other direction. Didn't realise you could get up through the cave, so I scrambled up the back side - a bit sketchy but doable. Turned around when I got to the 2m drop-off, couldn't quite convince myself it was the right way and decided this was not a route to do blind solo! Now I've got your detailed guide I'll have to get back up there to give it another go ;)
ReplyDeleteAfter doing this with a mate very interesting to see the route you took, me and my mate both similar in physical strength but him having substantially better climbing skills, took a quite different route even beginning the initial ascent, choosing to boulder up in the ravine rather than go via the caving route, as for the infamous ravine, we choose to do a 1km detour down the side of the mountain and free solo a juggy slab wall ~8m high, outside of those segments it left us feeling disappointed there weren't any more challenges, incredible views though. Will agree with waiting for good weather, we completed the circuit in only 2hrs 45mins but even with clear skies 3 days in a row prior, there was still slippery segments.
ReplyDelete